We will explore how to manage WooCommerce in your theme and cover key steps, from setting it up to customizing it to your needs.
- Go to Dashboard >> Plugins >> Add New Plugin
- In the search bar, type “WooCommerce”
- Click Install Now and then Activate
Once activated, WooCommerce will guide you through a setup wizard. In this wizard, you can configure basic store settings, such as currency, shipping, and payment options.
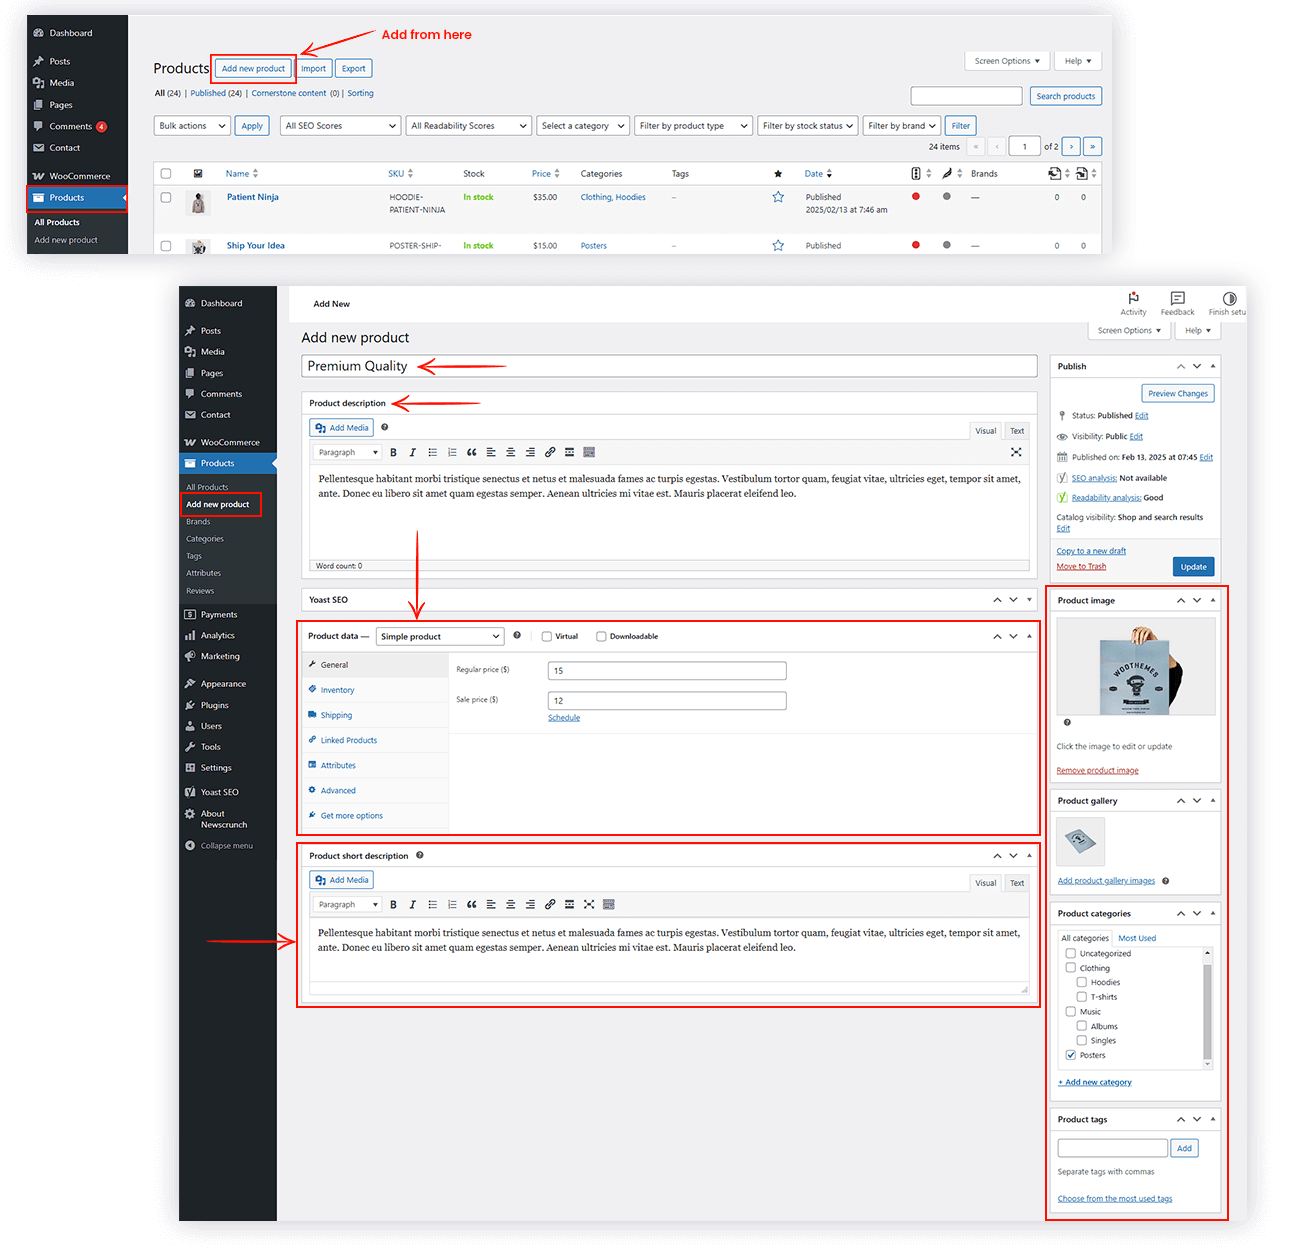
- Go to Products >> Add New Product
- Enter the product name, description, and set a featured image
- Under the Product Data, choose whether it is a simple product, variable product, or downloadable
- Set the price, SKU (stock keeping unit), and stock status
- For physical products, set weight and dimensions for shipping
- Under the Product Short Description, write a short description that will appear on the product page
- Do not forget to add product categories and tags to organize your store
Pro Features: Below mentioned features are available in NewsCrunch Plus
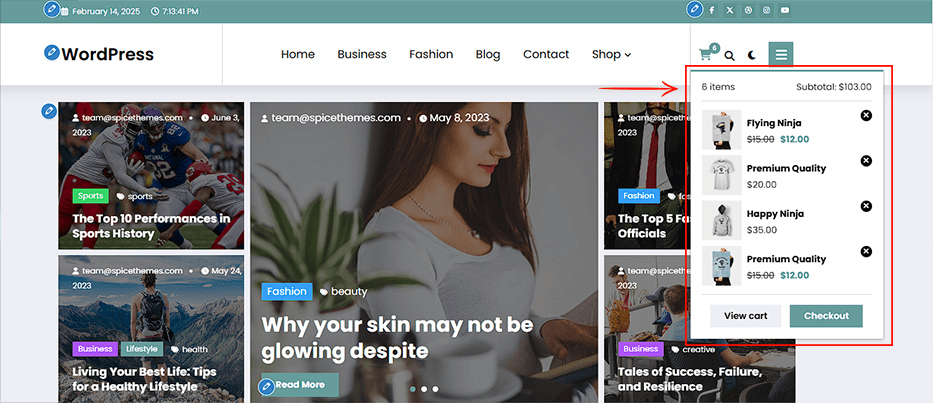
The Cart Popup feature displays a small, interactive window (popup) showing the contents of the shopping cart when a user adds an item. This feature provides a quick overview of the items in the cart without the need to navigate away from the current page. It’s often used to improve the user experience by offering a seamless way for customers to review their selections, make adjustments, or proceed to checkout.
Customize Product
To manage the products,
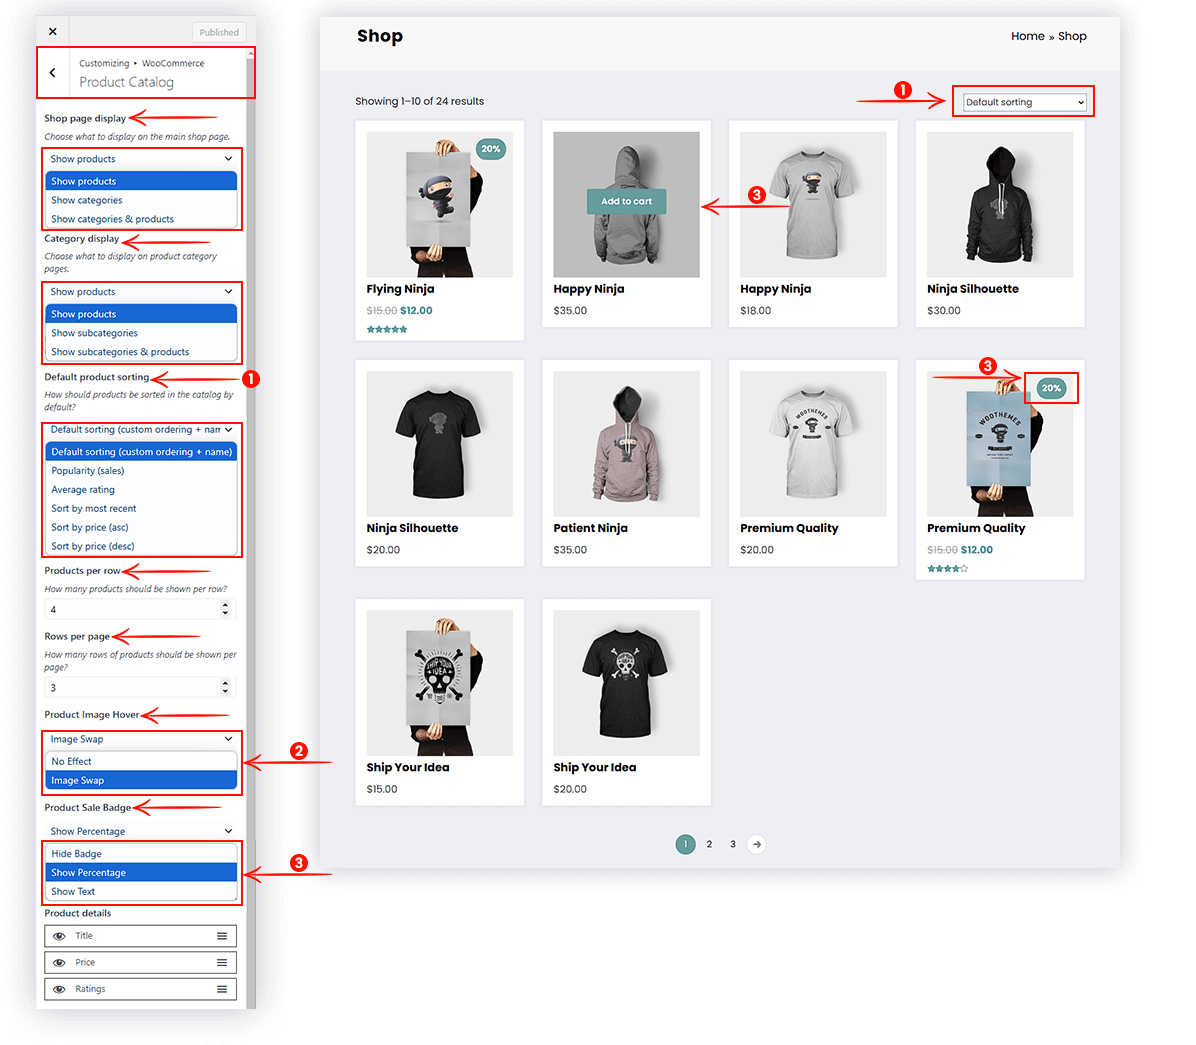
- Go to Dashboard >> Appearance >> Customize >> WooCommerce >> Product Catalog
- Shop Page Display: What you want to display on the shop page from Show products, Show categories, and Show subcategories & products
- Category Display: What you want to display on the product category page from Show products, Show categories, and Show subcategories & products
- Default Product Sorting: Sorting the product by popularity, rating, price, etc.
- Products Per Row: How many products do you want to show per row
- Row Per Page: How many raw of products do you want to show per page
- Product Image Hover: Set the product image effect from No Effect or Image Swap options
- Product Sale Badge: Show the product sale badger using Hide Badger, Show Percentage, and Show Text options
- Product Details: Hide/show and rearrange the product details using drag-drop settings
Customize Product Details
To manage the product details page,
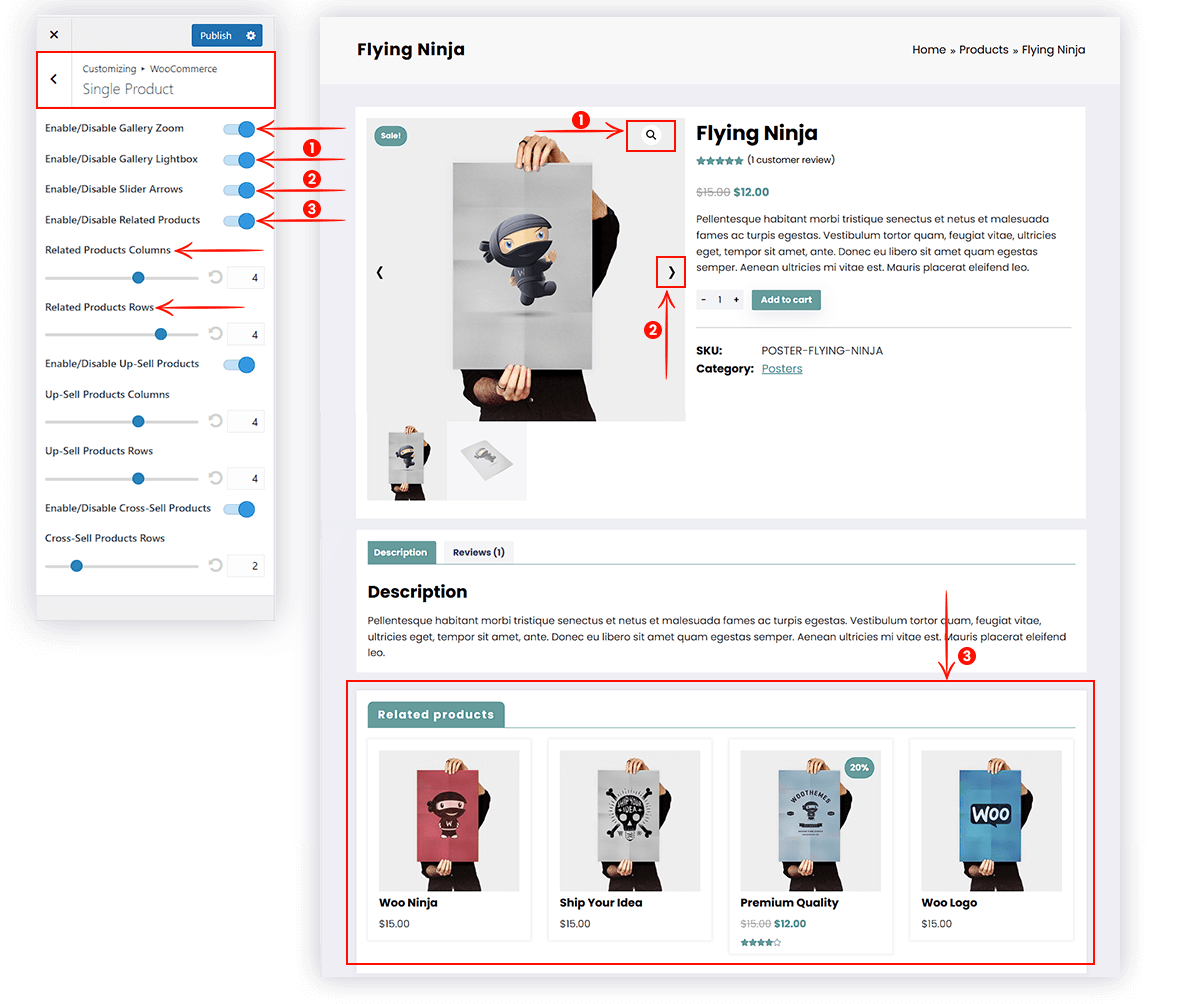
- Go to Dashboard >> Appearance >> Customize >> WooCommerce >> Single Product
- Enable/Disable product details image zoom
- Enable/Disable Gallery lightbox
- Enable/Disable product gallery slider slide icons
- Enable/Disable Related products
- If enabled, you can manage the row & column of the Related products
- Enable/Disable Up-Sell products
- If enabled, Manage the row & column of the Up-Sell products
- Enable/Disable Cross-Sell product (The Cross-Sell products are shown on the Cart page)
- If enabled, Manage the row of the Cross-Sell products
To manage the product section on the homepage
- Go to Dashboard >> Appearance >> Customize >> WooCommerce Product
- Enable/Disable WooCommerece product section
- Heading: change the heading text of the product section
- Layouts: Select the product section layout from the given styles
- Product Categories: Select one or multiple categories of products that you want to display in this section
- Product Image Hover: Set the product image effect from No Effect or Image Swap options
- Product Sale Badge: Show the product sale badger using Hide Badger, Show Percentage, and Show Text options
- Navigation Style: Choose one of them from Bullets, Navigation, and Both options
- Animation Speed: Control the duration it takes for one slide to exit and the next one to appear
- Smooth Speed: Adjust the slide animation speed to be slower or faster
- Add a View button with text and URL. You can set the URL to open in a new tab.
